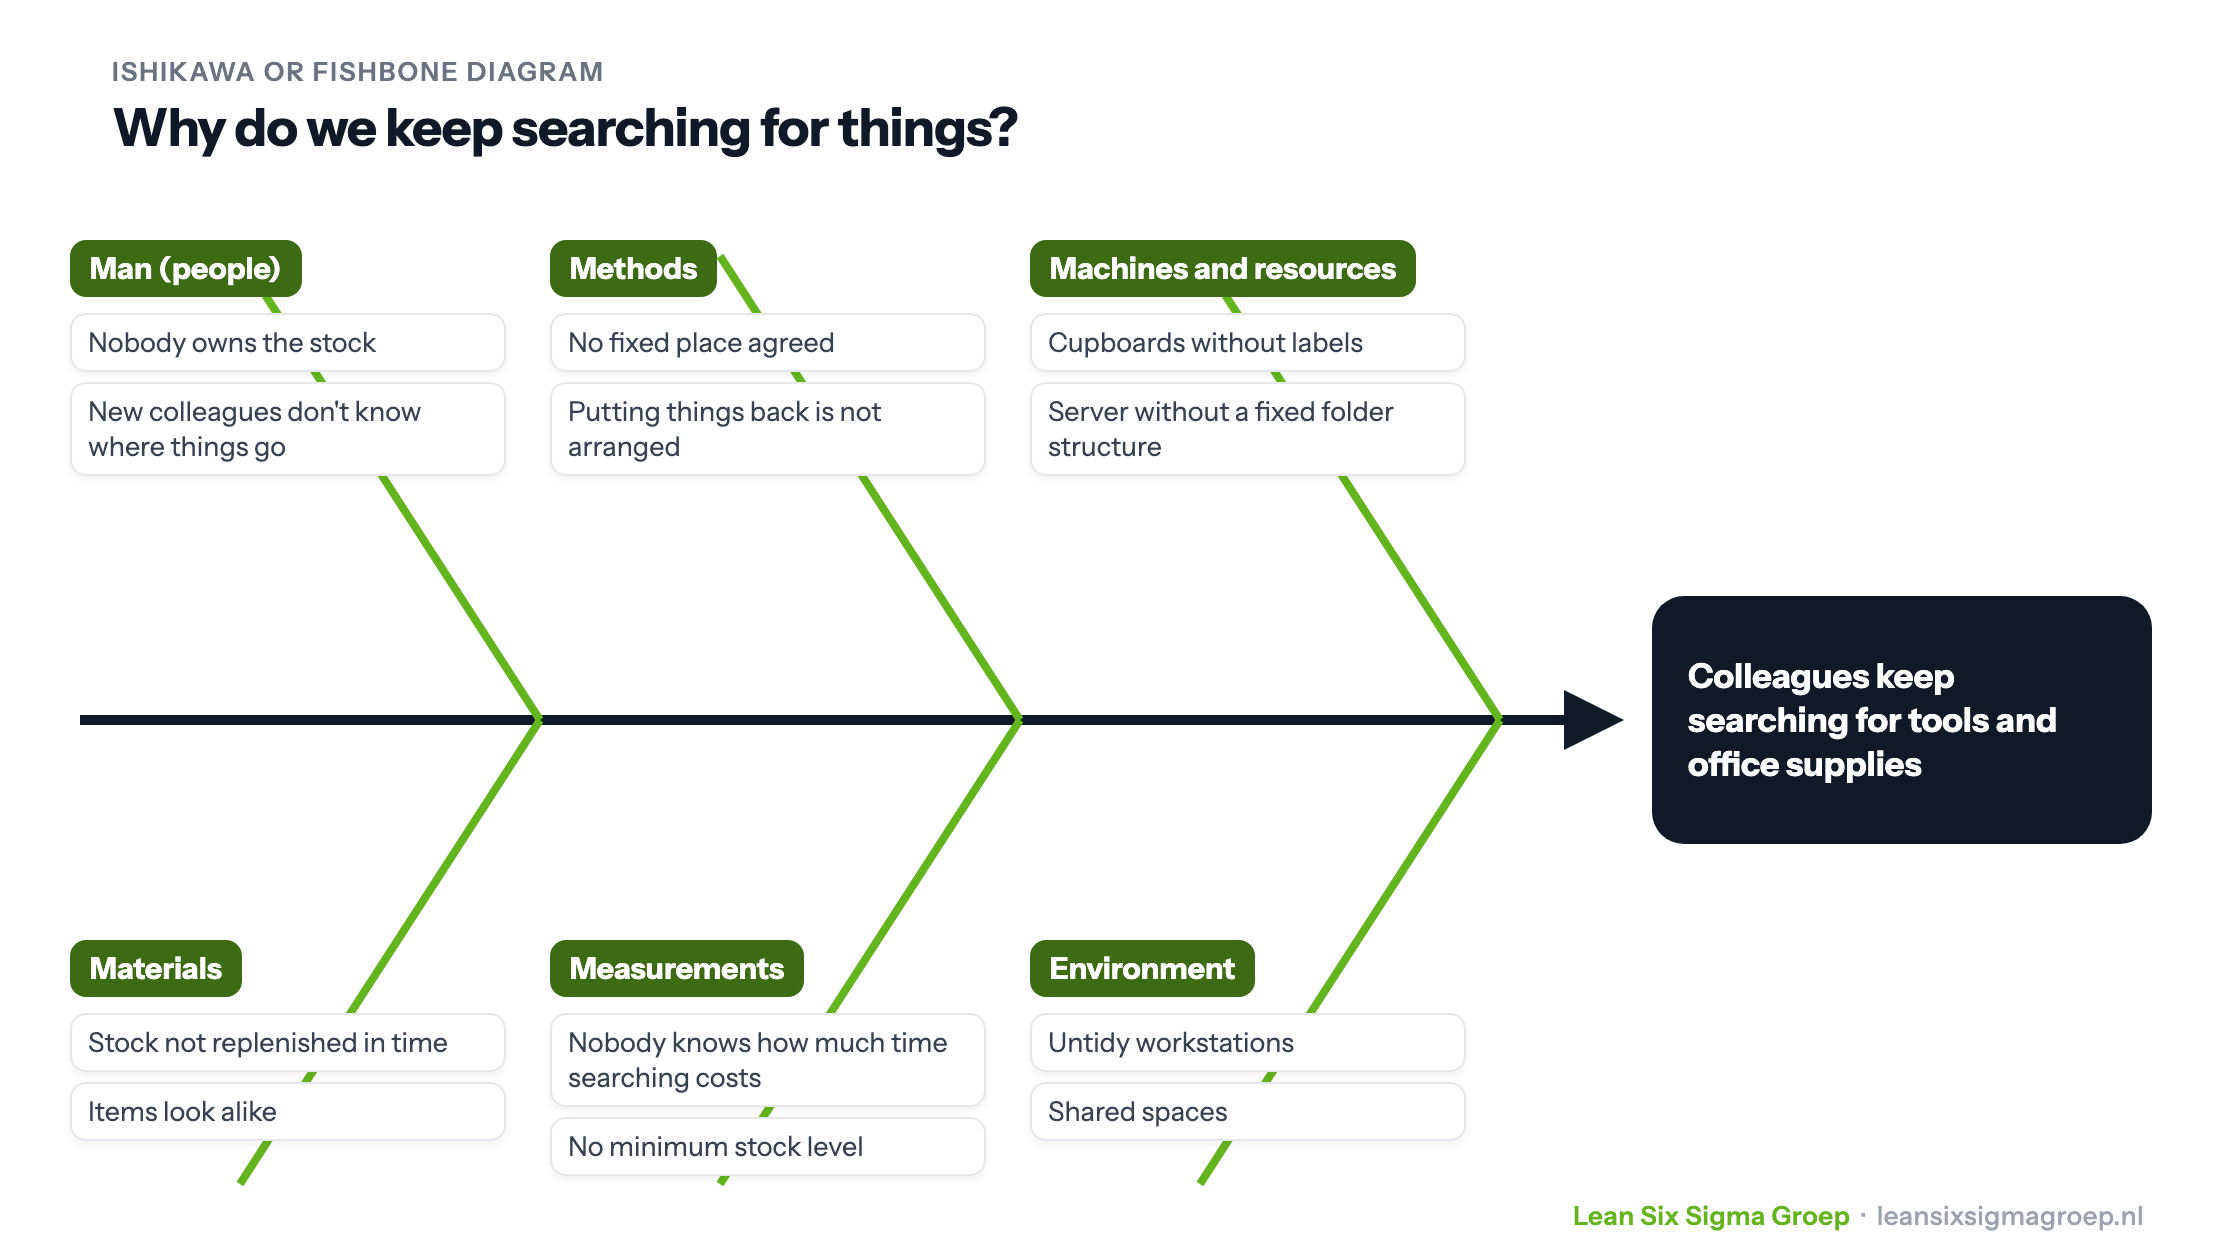
How do you make Lean practical with an Ishikawa or fishbone diagram? Fortunately, Lean is very practical: you can put it to use straight away, at work and even at home.
The theory and philosophy of Lean centre on the value added for the customer. From that customer value, we look at how best to design our processes. It is often simply a matter of common sense. Really living the philosophy is something you learn over the years.
Apply it straight away
The practical side of Lean is something you can apply immediately.
An example: colleagues tell you they cannot find certain things quickly. These may be tangible things, such as tools, office supplies or crockery, but also less tangible things, such as documents on the server.
The problem seems solved the moment the searcher shouts “Found it!”. But is it? You can also ask why people have to search again and again.
Why is there no fixed place? Why isn’t stock replenished automatically? And why do the searchers always come to you to complain, costing you working time?
This is one of the tools you learn to apply in the Green Belt training.
Put on your Lean glasses
This is where you can use Lean in a very practical way. With your Lean glasses on, carry out a cause analysis with an Ishikawa diagram. It sounds grand and complicated, but it is nothing more than a large sheet of paper on which you and your colleagues look for the causes of the problem. You go through these steps:
- Write possible causes on post-its (brainstorming).
- Group the ones that belong together.
- For each post-it, ask why it is a cause: what lies behind it? Asking why up to five times brings you closer and closer to the source of the problem.
This takes some tact and practice. You can learn it with us, practise it live and put it into practice under the guidance of one of our Black Belts. Take a look at our training courses.
How does a fishbone diagram work?
Kaoru Ishikawa (1915-1989) was a professor, consultant and driving force behind the development of quality management in Japan. He is best known for the fishbone diagram, which is named after him.
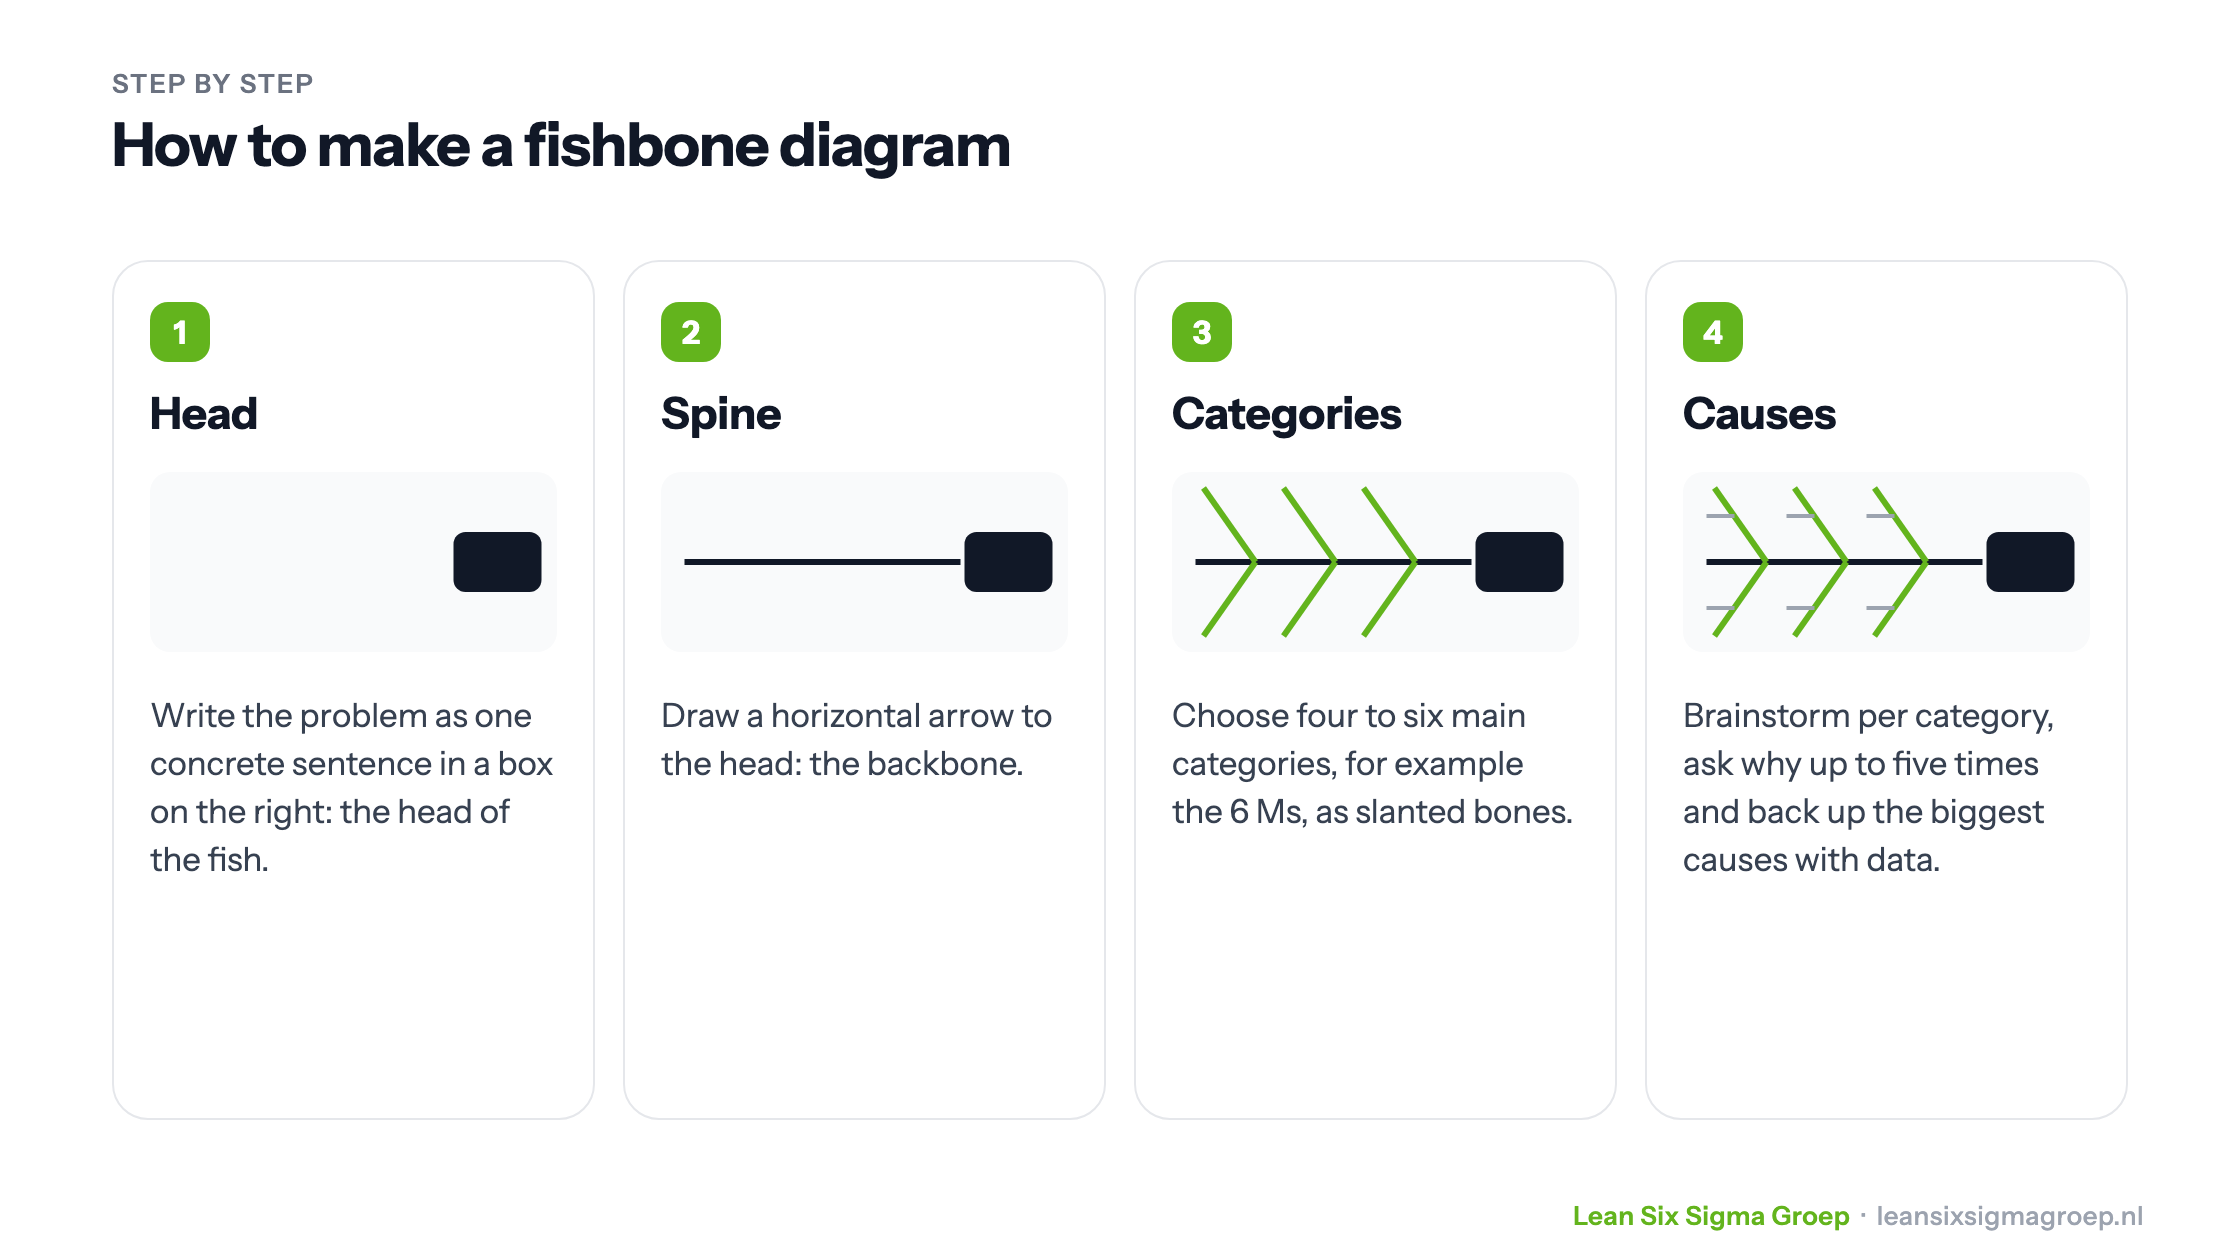
A fishbone diagram is usually made during a meeting, on a flip chart or whiteboard. Once you have a problem that needs further investigation, you go through these steps:
- Head: write the problem as one concrete sentence and draw a box around it. This is the head of the fish.
- Spine: draw a horizontal arrow across the sheet pointing to the head. This is the backbone.
- Categories: decide on four to six main cause categories, for example the 6 Ms below. Draw them as slanted bones off the spine.
- Causes: brainstorm the underlying causes per category. Ask why, up to five times, until you reach the root causes, and back up the most important ones with data before you choose countermeasures.
The six categories (6 Ms)
For the fishbone diagram at the top of this article we used these six categories:
- Man (people): everyone involved in the process.
- Methods: how is the process carried out, and which requirements (rules, procedures, regulations, laws) apply?
- Machines and resources: the equipment and tools needed to do the task.
- Materials: all the materials and parts used to make the product.
- Measurements: data from the process that you use to analyse quality.
- Mother nature (environment): what influence does the environment have? Think of place, time, season, temperature, culture and work ethic.
Why use a fishbone diagram?
Want to carry out a cause analysis yourself? Then we recommend the fishbone diagram, for these reasons:
- It quickly gives a clear overview of a cause analysis.
- It is one of the seven basic quality tools and is widely used in the Analyse phase of DMAIC.
- It brings many possible causes of a problem into view.
- It gives structure to a brainstorming session.
- It sorts ideas straight into useful categories.
Want to get started right away? Make a fishbone diagram online with our free Ishikawa tool, or download a template in Word.